🚰Extension Constants
Overview
In the Getting Started Workflow chapter, we have learned how to reference output variables (movie names). In addition, when we interact with various web pages, we will inevitably encounter the need to enter wallet addresses and token quantities. BrowTo provides the following system constants for input and configuration:
When referencing constants, you need to enter @[constant name](constant name) to distinguish them from ordinary input. For example, to reference metamask_account, you need to enter @[metamask_account](metamask_account)
Wallet (It is well known that MetaMaks can add multiple wallets)
metamask_account: current wallet address
metamask_account_1: the first wallet address
metamask_account_2: the second wallet address
And so on
Balance
metamask_balance_1: 10% of the current network token balance
metamask_balance_2: 20% of the current network token balance
And so on to 10, that is, metamask_balance and metamask_balance_10 both represent the balance of all tokens
Note: When referencing the above variables, you need to unlock or connect your wallet before you can reference them normally.
Test
Next, let’s complete a script for automatically claiming funds on the Holesky test network. Open Google Chrome and go to https://faucet.triangleplatform.com/ethereum/holesky . Then right-click Inspect to find the recorder and click Start Recording (for detailed steps, go to the recording script in the Getting Started section ). Then click the web input box in turn, paste your wallet address, and click Request 0.001ETH. Wait for the prompt to succeed:

In order to prevent recording some unnecessary operations, we stop recording first. If you find that unnecessary operations are recorded, you can click the Delete button in the More menu of the current step.
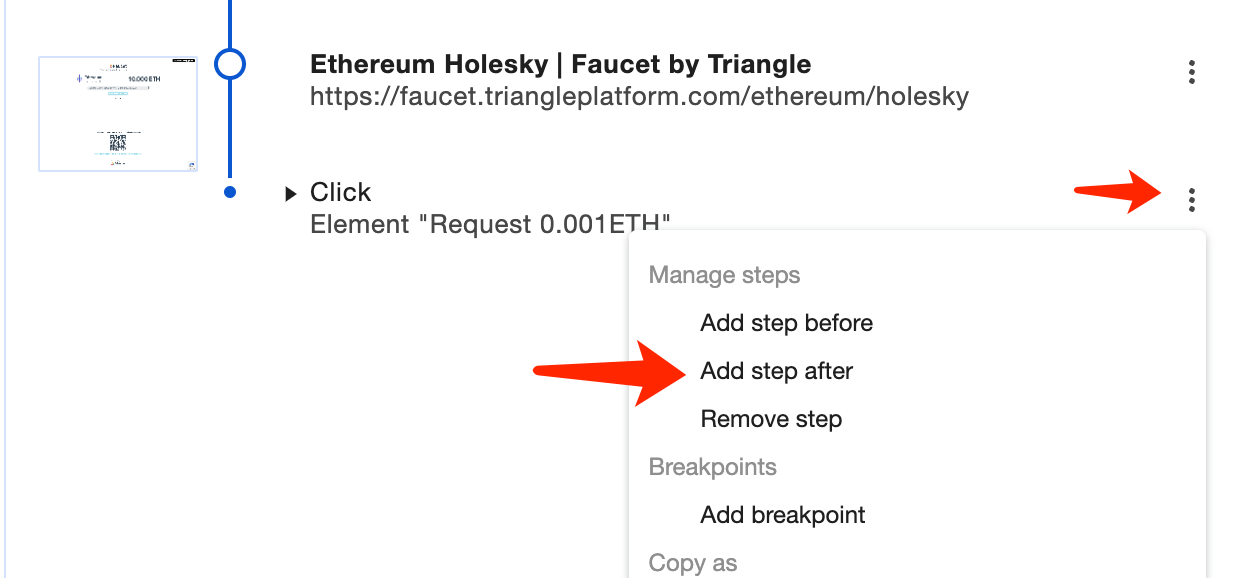
Usually when we record a script, in order to know whether the script is executed successfully, we will add a step at the end, that is, wait for the success mark to appear. For this script, we need to wait for Success or the Tx of the transaction to appear, so we choose to add a step at the end in the menu of the last step of the recorder:

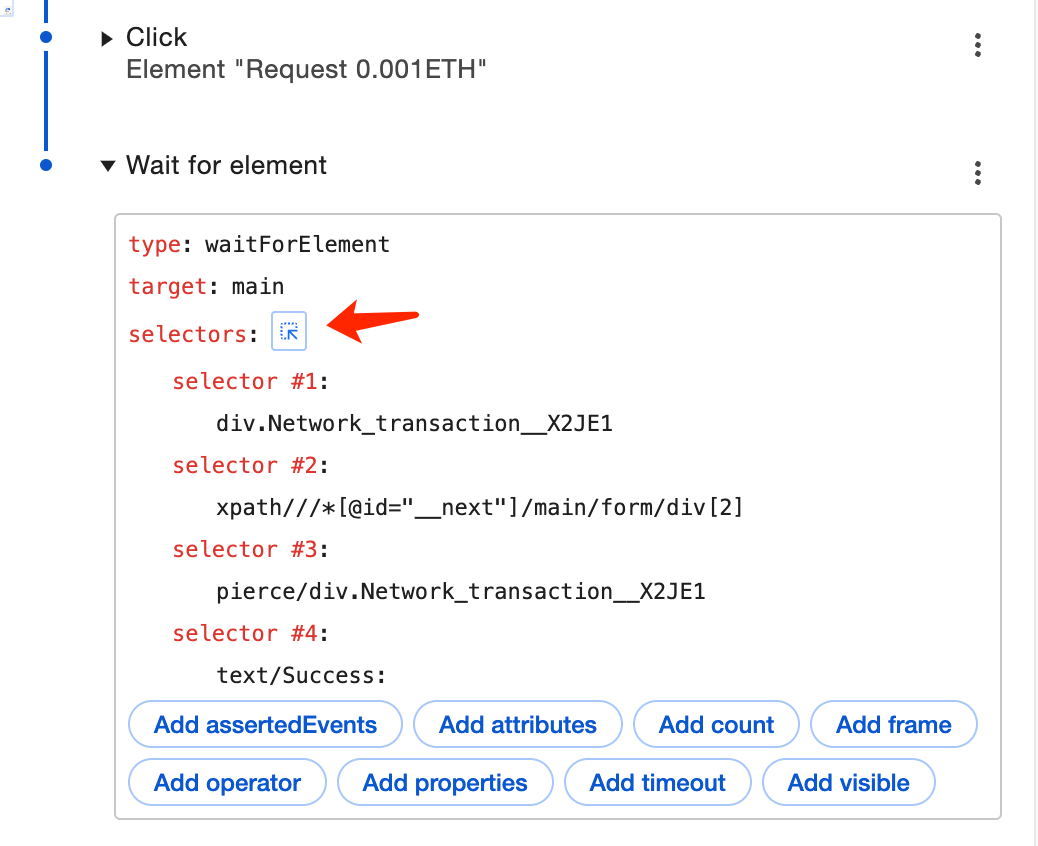
Keep the default waitForElement for type, then click the selection button on the right side of selectors, and then select the Success text on the web page. The selectors in the recorder will be automatically filled in:

Then we save the script as a JSON file, import it into BrowTo, and start configuring the script. First, we need to unlock the wallet by quoting the wallet address, so we expand the first step web address and select MetaMask in the binding plug-in operation to unlock the wallet:

Next, expand the wallet address input step, click Set as Local Configuration Item, configure the name as Wallet, and the type as Text/Number:

The final result is shown in the figure below. We click Update:

Finally, return to the script configuration window and enter @[metamask_account_1](metamask_account_1) in the wallet input box, which is the first wallet address. The input will be automatically recognized as a gray background in the reference format:

Finally, click Update and Save, then Run. You can see that the window we bound automatically helps us complete the function of receiving the test token to the first address of the wallet.
Last updated